Notice
Dreamtonics has released a comprehensive official user manual along with version 1.11.0 of Synthesizer V Studio; this unofficial manual will no longer be maintained. Please visit the Official User Manual for all future updates and information.
Setup and Activation
To begin using Synthesizer V Studio, you must install the application (Basic or Pro edition) and at least one voice database. For a list of feature differences between editions, check the store page for Synthesizer V Studio Pro on the Dreamtonics Store.
Purchase & Download
If you are just getting started, you may want to try out the software with the free Basic edition and a lite voice database. Be aware that lite voice databases are lower quality than their paid counterparts and offer significantly reduced functionality.
Get Synthesizer V Studio Basic (free) Try SOLARIA lite (free)
After purchasing the Pro edition or a paid voice database product, your order confirmation email will include download instructions which may vary based on the vendor you purchased from. To download purchases from the Dreamtonics Store, enter your product activation code on the Dreamtonics website.
If you have purchased the Pro edition of the software, you can download and use the voice database Mai at no extra charge.
Warning
Always save your order confirmation emails and keep your product activation codes in a safe place. The vendor you purchase from will not always be able to help recover lost or compromised activation codes.
Vendors
Approved vendors include, but are not limited to:
- The Dreamtonics Store
- AH-Software
- AHS is the primary distributor of Dreamtonics products in Japan, however their web store can be used by international buyers as well.
- Eclipsed Sounds
- Audiologie
- ANiCUTE
- Voicemith
- DLsite (AH-Software | Internet Co. | Bushiroad Music)
- Amazon Japan (AH-Software | Bushiroad Music)
- Taobao (Dreamtonics | Quadimension)
Installation (Windows & Mac)
Execute the installer (.exe format on Windows, .pkg format on Mac) by double-clicking it, or by selecting it in your file browser and pressing Enter. Follow the on-screen instructions.
If installing the Pro edition you will be prompted for your product activation code upon launching the application.
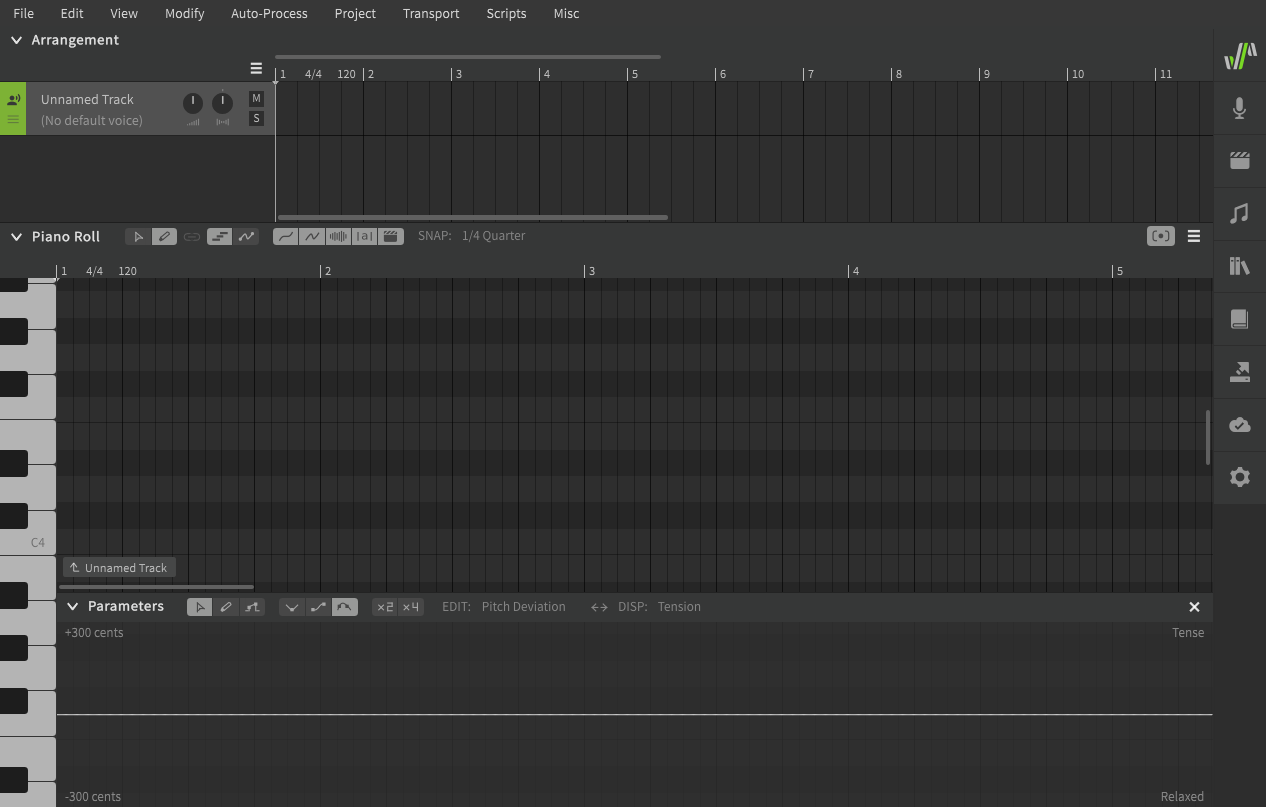
Once you have successfully installed the software (and activated it, if necessary), you will be presented with the following application window.
Installing a Voice Database
To install a voice database, double-click the .svpk file or drag-and-drop it from your file browser into the Synthesizer V Studio window. An installation dialog will be displayed. Follow the on-screen instructions, and take note of the terms of use when they are displayed. The license agreement may vary between voice databases.
If installing a paid voice database product, you will be prompted for your product activation code.
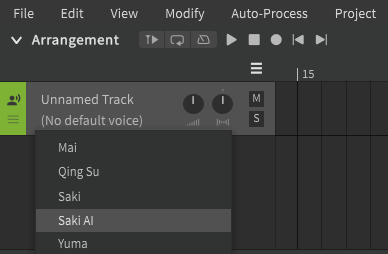
Once you have successfully installed a voice database (and activated it, if necessary), it will be listed in the singer selection dropdown.
Installation (Linux)
Navigate to your desired install directory and unzip the downloaded archive. If you are extracting to a location outside your home directory (~), you may need to run unzip as root (ie with sudo), such as in this example where Synthesizer V Studio is being extracted to /opt:
cd /opt
sudo unzip ~/Downloads/svstudio-pro-linux64.zip
cd /opt
sudo unzip ~/Downloads/svstudio-basic-linux64.zip
If extracting to a location outside your home directory, you may also need to modify the ownership or permissions of the files. This example will work for most situations:
sudo chown -R $(whoami):$(whoami) "Synthesizer V Studio Pro"
sudo chown -R $(whoami):$(whoami) "Synthesizer V Studio Basic"
Launch the application by running the synthv-studio executable from the terminal.
cd "Synthesizer V Studio Pro"
./synthv-studio
cd "Synthesizer V Studio Basic"
./synthv-studio
If installing the Pro edition you will be prompted for your product activation code.
Once you have successfully installed the software (and activated it, if necessary), you will be presented with the following application window.
Installing a Voice Database
To install a voice database, run the synthv-studio executable from the terminal and provide the .svpk file as an argument. The exact file name will vary depending on the voice database you are installing.
./synthv-studio ~/Downloads/saki-ai-lite-install-101.svpk
The application will launch and an installation dialog will be displayed. Follow the on-screen instructions, and take note of the terms of use when they are displayed. The license agreement may vary between voice databases.
If installing a paid voice database product, you will be prompted for your product activation code.
Once you have successfully installed a voice database (and activated it, if necessary), it will be listed in the singer selection dropdown.
Telemetry Consent
Upon launching the software for the first time, you will be presented with the Telemetry Consent dialog.
These options can always be changed via the "Configure usage data collection" button near the top of the Settings panel.
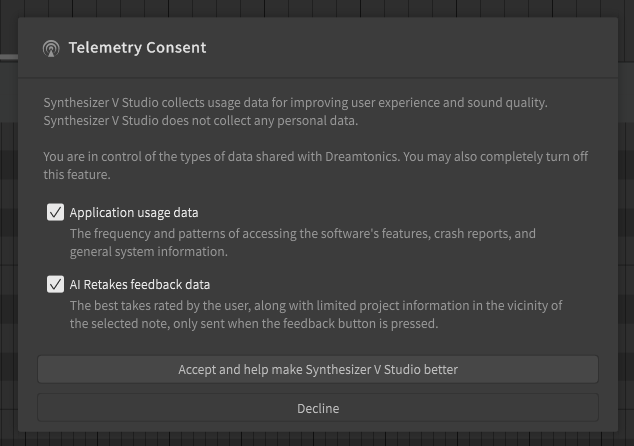
Application usage data
If checked, information about how you use the software will be sent to Dreamtonics. This includes how often each feature is used, render times, crash reports, and other anonymous data.
This information can help the development team identify which features might be confusing to users, which features are considered most useful, any hardware configurations that cause poor performance, etc.
AI Retakes feedback data
If checked, information about AI Retakes you "Like" (those marked with the heart icon) will be sent to Dreamtonics.
These preferred takes can be used by the development team to refine the AI pitch models to improve the reliability, consistency, and realism of the synthesized voices in future updates.
The transmitted retakes include minimal snippets of project data required to reconstruct your preferred retake, such as note duration and pitch, phoneme data, the selected voice database, etc. This collected data is strictly controlled by Dreamtonics and is used exclusively for research and development purposes.
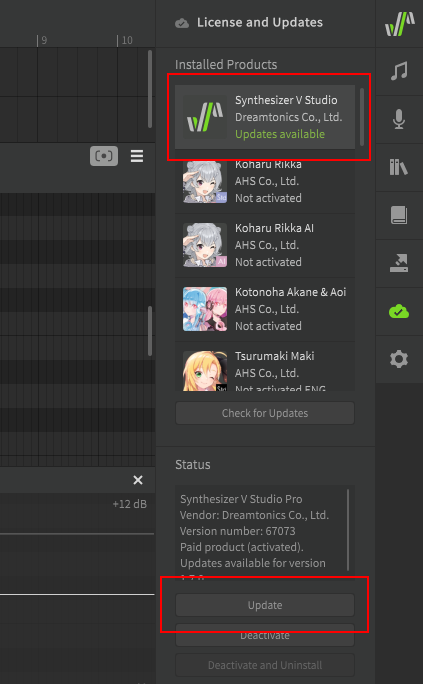
Updating the Software
Open the License and Updates panel and click "Check for Updates" to search for updates.
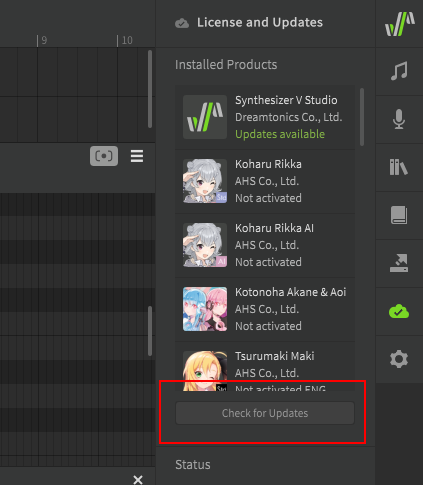
When an available update is shown under the product name, select the product and click the "Update" button below the list. The software will begin to download the update package and you will be guided through the installation process.
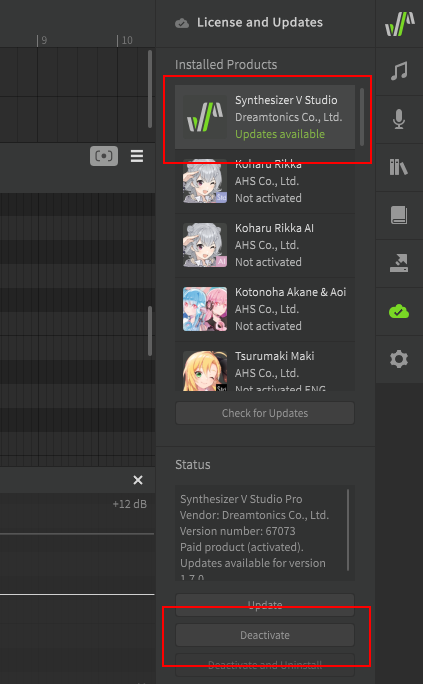
Deactivating a Product
When you need to transfer your license to a new device, perform hardware/firmware upgrades, or reinstall your operating system, you must first revoke the license by deactivating the product.
To deactivate a product, select it in the "License and Updates" panel and click the "Deactivate" button below. The activation on the current device will be revoked, and can be safely reactivated on the new or upgraded device.
Note
Ensure that all voice databases are deactivated before deactivating or uninstalling Synthesizer V Studio. If you proceed with the uninstallation while activated voices remain on the system, you can recover the licensing status for the voices by reinstalling and reactivating Synthesizer V Studio.
Troubleshooting
If you encounter technical issues with the software, try removing the software and reinstalling to the default installation directory. Windows users may need to run the installer as administrator, and Linux users should verify the file permissions of the Synthesizer V Studio directory.
If the problems persist, search for similar issues on the official forums or contact Dreamtonics support.